Spark Python
- Basica tutorial to setup environment on linux
- Prerequisites Java JDK
- Spark installation in VM linux
- Python3 via Anaconda easy installation
- Spark in Jupyter Notebook SDK
- Connect to jupyter notebook in the remote server
- Solve pyspark ip loopback issue
- Further troubleshoot
- Simple APP tutorial
Basica tutorial to setup environment on linux
https://www.datacamp.com/community/tutorials/apache-spark-python
Prerequisites Java JDK
Open terminal in linux:
verify if you have already java jdk java -version
if you want to use a newer version, please uninstall old ones.
To uninstall Java: https://www.java.com/en/download/help/linux_uninstall.xml
type: rpm -e jre--fcs
Unpack the tarball and install the JDK.
tar zxvf jdk-8uversion-linux-x64.tar.gz
The Java Development Kit files are installed in a directory called jdk1.8.0_version in the current directory.
Delete the .tar.gz file if you want to save disk space.
official guide: https://docs.oracle.com/javase/8/docs/technotes/guides/install/linux_jdk.html#BJFJJEFG
Java guide from elastic search: https://docs.wso2.com/display/ELB201/Installing+Java+Development+Kit+%28JDK%29+on+Linux
Spark installation in VM linux
download https://www.apache.org/dyn/closer.lua/spark/spark-2.2.0/spark-2.2.0-bin-hadoop2.7.tgz
unzip tar zxvf spark-2.2.0-bin-hadoop2.7.tgz
type mv spark-2.1.0-bin-hadoop2.7 /usr/local/spark
Open README.MD in /usr/local/spark and follow instruction to build if needed.
start pyspark shell interface, go to path /usr/local/spark, type ./bin/pyspark
start pyspark web interface that the application UI is available at localhost:4040, type ./bin/pyspark --master local[*]
Set up path: http://tsarx.com/2017/06/how-to-set-path-for-apache-spark-in-linux/
SPARK_HOME="/usr/local/spark"
export SPARK_HOME
PATH=$PATH:$SPARK_HOME/bin

# similar for JAVA_HOME
export JAVA_HOME="path that you found"
export PATH=$JAVA_HOME/bin:$PATH
https://unix.stackexchange.com/questions/129143/what-is-the-purpose-of-bashrc-and-how-does-it-work
export PATH=”$PATH:/some/addition”
If you put above in .bashrc instead, every time you launched an interactive sub-shell, :/some/addition would get tacked on to the end of the PATH again.
Python3 via Anaconda easy installation
New Jupyter has stop supporting Python2.7, please use python3.
Jupyter tutorial https://www.datacamp.com/community/tutorials/tutorial-jupyter-notebook
install via Anaconda: download https://www.anaconda.com/download/#linux and install https://conda.io/docs/user-guide/install/linux.html
type: bash Anaconda-latest-Linux-x86_64.sh you can uninstall old conda if you like.
then make the installation path in ~/.bashrc type export PATH=/predix/anaconda3/bin:$PATH
then activate this file source ~/.bashrc
Spark in Jupyter Notebook SDK
FindSpark package is needed and a classical example explained
https://blog.sicara.com/get-started-pyspark-jupyter-guide-tutorial-ae2fe84f594f
https://github.com/adrienlina/jupyter-silent-import/blob/master/results_presentation.ipynb
# findspark is a module used to locate the spark path
pip install findspark
# start your jupyter notebook SDK
jupyter notebook
inside your jupyter notebook
import findspark
findspark.init()
# or just indicate clearly the path
findspark.init('/path/to/spark_home')

import pyspark

def fn():
    pass
Approximation of Pi, how to calculate. The area of the $[-1, +1]^2$ square is $2^2 = 4$. The area of the unitary circle is $\pi * 1^2 = \pi$. This means that we have a chance of $\frac{\pi}{4}$ of choosing a point that is inside the circle. The Monte Carlo part is about taking many samples to approximate that chance.
Connect to jupyter notebook in the remote server
Working in VM is something not very comfortable, so you might want to access a remote server
via jupyter notebook, it’s possible but requires a few steps config.
https://hsaghir.github.io/data_science/jupyter-notebook-on-a-remote-machine-linux/
https://coderwall.com/p/y1rwfw/jupyter-notebook-on-remote-server
First SSH login to remote server
me@local_host$ ssh user@remote_host
Then start the jupyter notebook in remote server Without openning the jupyter notebook in browser and give a specific port number In case you’re running as root, you should be asked to add flag –allow-root
user@remote_host$ jupyter notebook --no-browser --port=8889
Now open a new terminal window, forward remote_server:port to your localhost:port via SSH As VirtualBox is set NAT, actually local and server IPs can be both localhost
me@local_host$ ssh -N -L localhost:8888:localhost:8889 user@remote_host
-N options tells SSH that no commands will be run and it’s useful for port forwarding -L lists the port forwarding configuration that we setup.
In the end open a browser on your localhost, then type localhost:8888, you are ready to go.
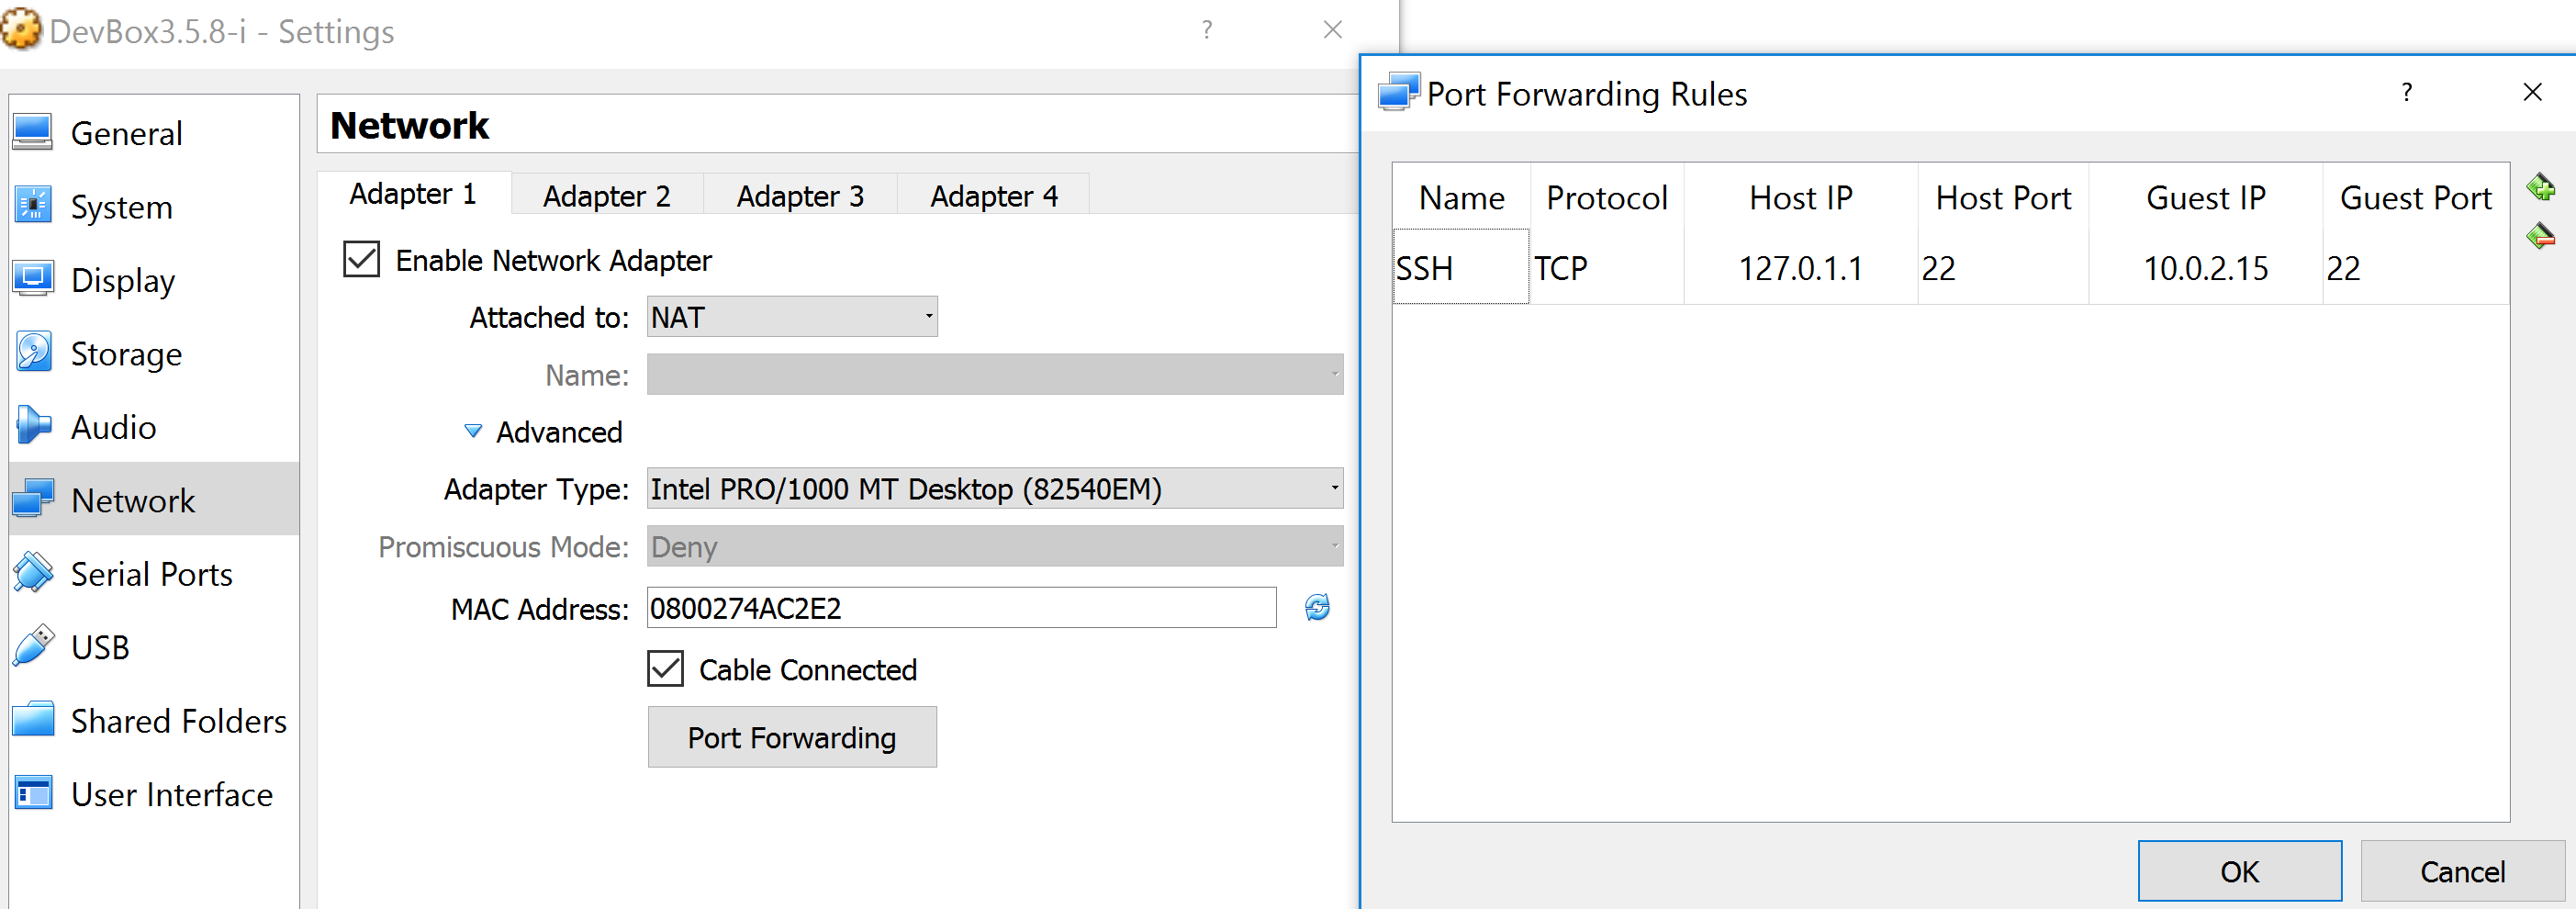
But there is a tricky part in case of remote server is in VirtualBox
https://unix.stackexchange.com/questions/145997/trying-to-ssh-to-local-vm-ubuntu-with-putty

VirtualBox will create a private network (10.0.2.x) which will be connected to your host network using NAT. (Unless configured otherwise.) This means that you cannot directly access any host of the private network from the host network. To do so, you need some port forwarding. In the network preferences of your VM you can for example configure that VirtualBox should open port 22 on 127.0.1.1 (a loopback address of your host) and forward any traffic to port 22 of 10.0.2.1 (given that is the internal address of your VM) This way you can point putty to Port 22 of 127.0.1.1 and VirtualBox will redirect this connection to your VM where its ssh deamon will answer it, allowing you to log in.
# Attention 127.0.1.1 loopback IP to be used not 127.0.0.1
$ ssh predix@127.0.1.1
predix@127.0.1.1$ jupyter notebook --no-browser --port=8889
In a new terminal, forward traffic from remote server VM 8889 to your locahost:8888
$ ssh -N -L 8888:localhost:8889 predix@127.0.1.1
# open a new browser to use localhost:8888
Solve pyspark ip loopback issue
If you run your env in a virtualbox linux, you don’t have localhost as ip for pyspark
To change IP: add the SPARK_LOCAL_IP in the /usr/local/spark/spark-env.sh file
export SPARK_LOCAL_IP="<IP address>"
This file is located at $SPARK_HOME/conf/, where $SPARK_HOME is the location of your Apache Spark installation.
https://support.datastax.com/hc/en-us/articles/204675669-Spark-hostname-resolving-to-loopback-address-warning-in-spark-worker-logs
example file https://gist.github.com/berngp/10793284
You will find a template spark-env.sh.template and use it.
WARN Utils: Your hostname, Linuxdevbox resolves to a loopback address: 127.0.0.1; using 10.0.2.15 instead (on interface enp0s3)
17/12/07 16:17:50 WARN Utils: Set SPARK_LOCAL_IP if you need to bind to another address
Further troubleshoot
WARN NativeCodeLoader: Unable to load native-hadoop library for your platform… using builtin-java classes where applicable
https://stackoverflow.com/questions/40015416/spark-unable-to-load-native-hadoop-library-for-your-platform
set HADOOP_HOME to point to that directory.
add $HADOOP_HOME/lib/native to LD_LIBRARY_PATH
https://discuss.pivotal.io/hc/en-us/articles/219403388-How-to-eliminate-error-message-WARN-util-NativeCodeLoader-Unable-to-load-native-hadoop-library-for-your-platform-with-gphdfs
Although those warning message displayed, calculation of program finishes in 10 -15 mins.
Simple APP tutorial
https://www.dezyre.com/apache-spark-tutorial/pyspark-tutorial
https://spark.apache.org/docs/2.2.0/rdd-programming-guide.html#parallelized-collections